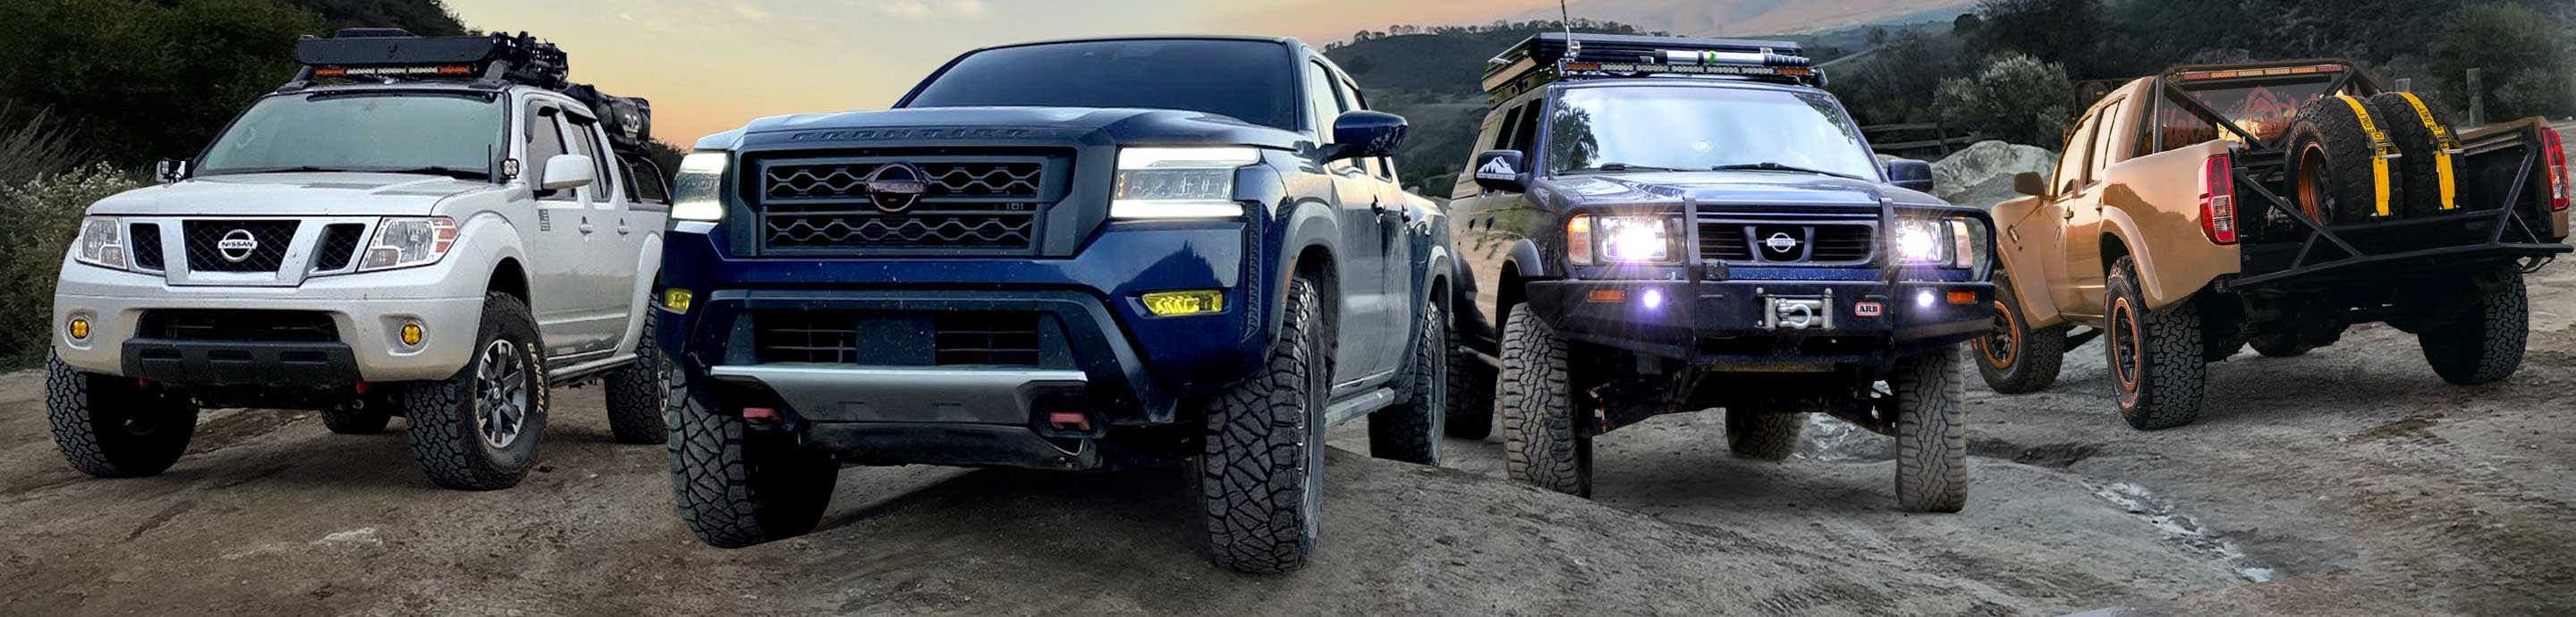

Part 1:
Funds and time limited what I could do for the first year, so the time I did have I took it wheeling to get to know it and figure out what I wanted to do first. Due to the limited funds and time, it gave me a chance to really search for a camper shell. I wanted an aluminum one to keep the weight down, and I finally scored a used one on Craigslist about 1.5 hours from the house. It was worth the drive to save about $1500 - $2000 when compared to a new one.
Before paint:
![Image]()
The wife said I couldn’t leave it white, so I had to paint it. Now, I’ve watched some Robby Leyton on the ‘ol YouTube, and figured I’d have a go. I bought primer and aerosol cans of paint with the same paint code as my truck from automotivetouchup.com and started prepping while I waited for it to arrive.
First I sanded it with some 100 grit. I also used a plastic scraper to clean out some of the sealant at every seam. During the rainy season I noticed that it was leaking; I figured I’d reseal it after painting.
![Image]()
After sanding I rinsed it off, let it dry, hit it with a tack cloth a couple times, then taped the seams. Then I set up a paint booth in the front of the house.
![Image]()
I didn’t get a shot of it after it was primed, but I used black automotive primer, this was the start of my learning curve. I did a couple coats and sanded in between, but it was still a little rough. I think on the final coat I wet sanded it with like 600 or 800 grip paper. It was still not totally smooth but I decided to just move forward to paint.
And that was learning curve number 2.
![Image]()
In the above photo you can see it look kind of dull. Well the paint was pilling (so says the google). It seemed that micro-paint droplets were bouncing off the shell and making like a dust that I could wipe off. UGH! After playing around with it more (and wetsanding it with 800grit), I figured out that I needed to move just a little slower, hold the nozzle a little closer, and put more paint on. It was surprising how well the paint stuck and didn’t drip as I was putting on somewhat heavy coats. But all was not well. The paint was certainly not smooth, I had some drips, and every so often the nozzle would splatter or drip from the aerosol.
Yeah, I know…”Why’d you use aerosol cans?” Well, I don’t have a compressor and I thought it would be easy to just use rattle cans. (Hindsight)
After several coats, it was on to the clear coat. I did several coats of that and it made it look a little better, but certainly not close to OEM…or even Maaco as you can see.
![Image]()
The camera actually pulls out much more imperfections. It doesn’t look that bad in person. Well, at least my wife says so. And that’s what really mattered.
After the paint and removing the tape, I went to every seam (except the one down the middle of the roof) and used DAP Polyurethan Commercial Sealant (just a single tube) to seal the seams. (Note: we’ve since gotten some rain and its dry inside). If you ever get one of these, be sure to put a dab of some kind of sealant at each end of the hurricane hinge. My truck sits on a slant in my driveway and it was just enough where rain ran down the hinge and into the truck (just a little, though). I added some at each and now there’s no leaks.
Just before I installed it on my truck, we had a bit of wind and my paint booth decided that it wanted a better view of the neighborhood.
![Image]()
Believe it or not, it seems to have lifted directly up and off and didn’t touch the camper. That leg hanging down had some 550 cord on it and it even got caught under a 4x4 that was holding up the shell. I think that saved it from bumping the shell. It didn’t even break our fiber optic line to the house.
Before putting on the cap, I removed the whale tale
![Image]()
![Image]()
I bought this Replacement Cap replacement off Amazon. It needed a little modification to wrap around the emblem a bit better. And it doesn’t sit flush due to the rivnuts. I didn’t document it because I figure you all are smart and capable enough to figure out how to get it to work.
Funds and time limited what I could do for the first year, so the time I did have I took it wheeling to get to know it and figure out what I wanted to do first. Due to the limited funds and time, it gave me a chance to really search for a camper shell. I wanted an aluminum one to keep the weight down, and I finally scored a used one on Craigslist about 1.5 hours from the house. It was worth the drive to save about $1500 - $2000 when compared to a new one.
Before paint:
The wife said I couldn’t leave it white, so I had to paint it. Now, I’ve watched some Robby Leyton on the ‘ol YouTube, and figured I’d have a go. I bought primer and aerosol cans of paint with the same paint code as my truck from automotivetouchup.com and started prepping while I waited for it to arrive.
First I sanded it with some 100 grit. I also used a plastic scraper to clean out some of the sealant at every seam. During the rainy season I noticed that it was leaking; I figured I’d reseal it after painting.
After sanding I rinsed it off, let it dry, hit it with a tack cloth a couple times, then taped the seams. Then I set up a paint booth in the front of the house.
I didn’t get a shot of it after it was primed, but I used black automotive primer, this was the start of my learning curve. I did a couple coats and sanded in between, but it was still a little rough. I think on the final coat I wet sanded it with like 600 or 800 grip paper. It was still not totally smooth but I decided to just move forward to paint.
And that was learning curve number 2.
In the above photo you can see it look kind of dull. Well the paint was pilling (so says the google). It seemed that micro-paint droplets were bouncing off the shell and making like a dust that I could wipe off. UGH! After playing around with it more (and wetsanding it with 800grit), I figured out that I needed to move just a little slower, hold the nozzle a little closer, and put more paint on. It was surprising how well the paint stuck and didn’t drip as I was putting on somewhat heavy coats. But all was not well. The paint was certainly not smooth, I had some drips, and every so often the nozzle would splatter or drip from the aerosol.
Yeah, I know…”Why’d you use aerosol cans?” Well, I don’t have a compressor and I thought it would be easy to just use rattle cans. (Hindsight)
After several coats, it was on to the clear coat. I did several coats of that and it made it look a little better, but certainly not close to OEM…or even Maaco as you can see.
The camera actually pulls out much more imperfections. It doesn’t look that bad in person. Well, at least my wife says so. And that’s what really mattered.
After the paint and removing the tape, I went to every seam (except the one down the middle of the roof) and used DAP Polyurethan Commercial Sealant (just a single tube) to seal the seams. (Note: we’ve since gotten some rain and its dry inside). If you ever get one of these, be sure to put a dab of some kind of sealant at each end of the hurricane hinge. My truck sits on a slant in my driveway and it was just enough where rain ran down the hinge and into the truck (just a little, though). I added some at each and now there’s no leaks.
Just before I installed it on my truck, we had a bit of wind and my paint booth decided that it wanted a better view of the neighborhood.
Believe it or not, it seems to have lifted directly up and off and didn’t touch the camper. That leg hanging down had some 550 cord on it and it even got caught under a 4x4 that was holding up the shell. I think that saved it from bumping the shell. It didn’t even break our fiber optic line to the house.
Before putting on the cap, I removed the whale tale
I bought this Replacement Cap replacement off Amazon. It needed a little modification to wrap around the emblem a bit better. And it doesn’t sit flush due to the rivnuts. I didn’t document it because I figure you all are smart and capable enough to figure out how to get it to work.


